Everyday, we wake up to the abundance of content that is the Internet.
Whether its content generated from the data that we create, or the various feeds that we consume from around the web.
Our data lives everywhere.
Reports are here. Likes and shares are there. It’s an endless stream of data that we need to process, make sense of and action.
From a business perspective, we are generating more data than ever before across a growing number of platforms. And while having access to all this data is extremely exciting, making sense of it all can often be a challenge.
Not only that, it’s important to organize our business data into a view that drives business and customer value, so that we meet our client expectations & sustain a competitive advantage in the marketplace.
Organizing data is one of first steps towards we should take to better understanding the performance of our businesses.
Let’s take that first step now, and think about how to organize and bookmark / save our data that lives across the web using an app called data spaces.
Saving links with data spaces
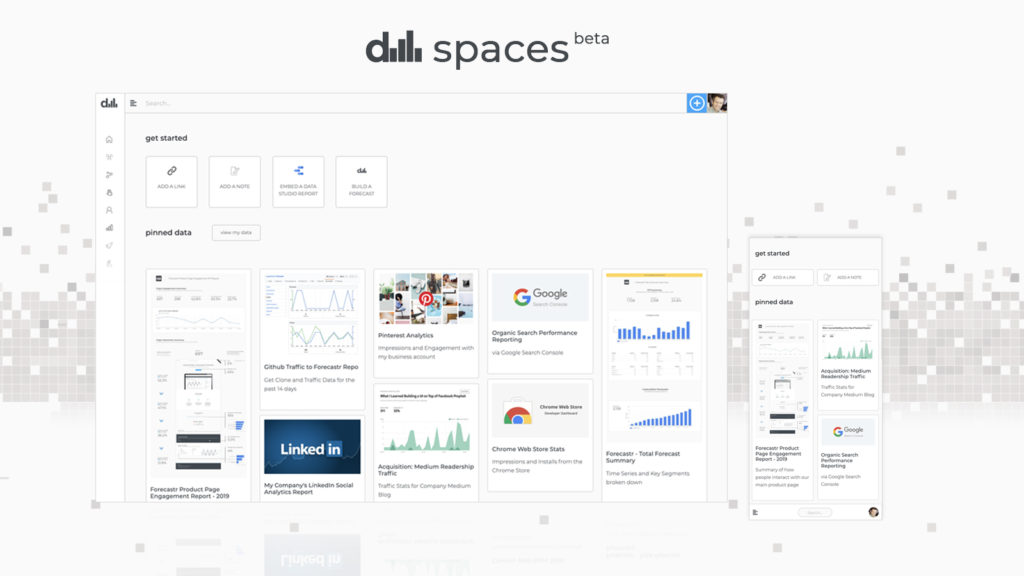
When you save a link with data spaces, you are presented with a few options.
If it’s a report, you can save it into categories such as:
- Acquisition
- Engagement
- Retention
- Growth
Think about the above sections as key focus areas you want data or intelligence on relating to the performance of your business. Ask yourself questions like:
- How are we acquiring new customers? What is the cost of that acquisition?
- How do customers engage with our products and services?
- How well are we retaining our customer base? What’s our Customer LTV?
- What are we doing to grow our business?
In addition to the above sections, you can also bookmark or save to an ‘Overview’ section, save to a space to ‘Explore’ data or even create your own Labs section for the truly innovative work you are most proud of.
Last but not least, you can save articles and tutorials that are important to you in the ‘Saved Stories and ‘Tutorials’ section. These could be topics or content that you could be researching for an existing workstream or a personal development project you might be working on.
Best of all, the links to all of this data is stored in your own personal Google Sheet, in a #nocode kinda way. The data spaces app makes it really easy for you to access this saved information as your current experience is powered by the data that lives in this spreadsheet. We want to be transparent with the data that you save into the app, so we actually save it into your own Google Sheet.
Here’s a quick demonstration video for how easy it is to save an article while browsing on the mobile web.
Video How to Save a Link to data spaces
Step by Step Summary
Next, we’ll recreate the above video as a step by step tutorial.
For this tutorial, let’s assume that you have a url to something that is important to you. Perhaps it’s a link to a report, a tutorial or an article for some research that you are currently working on.
If you don’t have a url, feel free to copy this url to your clipboard as an example.
Building a mobile friendly dashboard in Google Data Studio
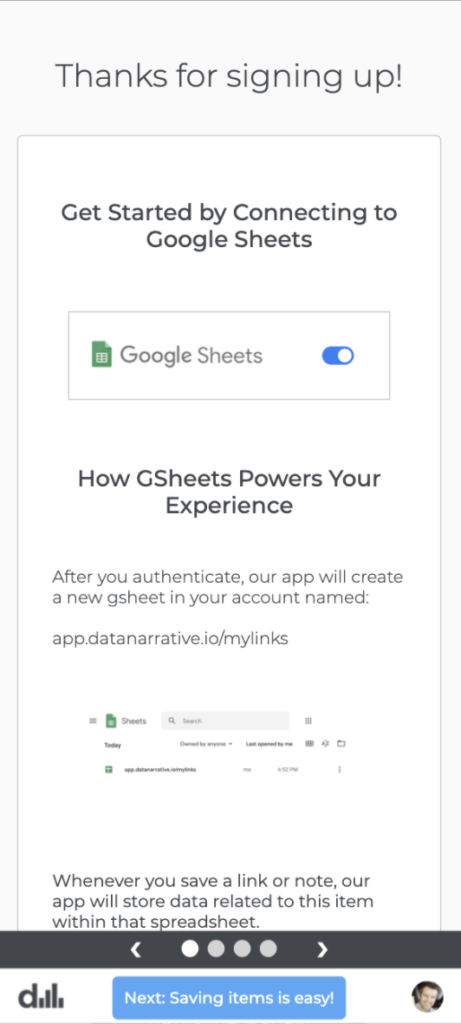
Step One: Login to data spaces with your Google Account and authorize Google Sheets.
Google Sheets is where you’ll store your data.
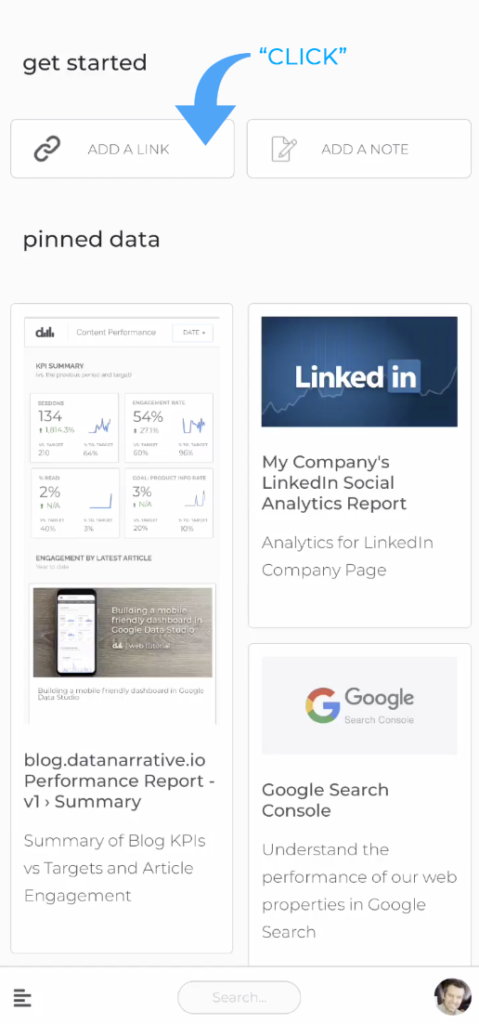
Step Two: Navigate to /home and click Add a Link
During onboarding you are presented with an opportunity to save a link to your own GSheet from there. This tutorial shows you how to save it from the /home screen, which is the place where you land each time you login to data spaces.
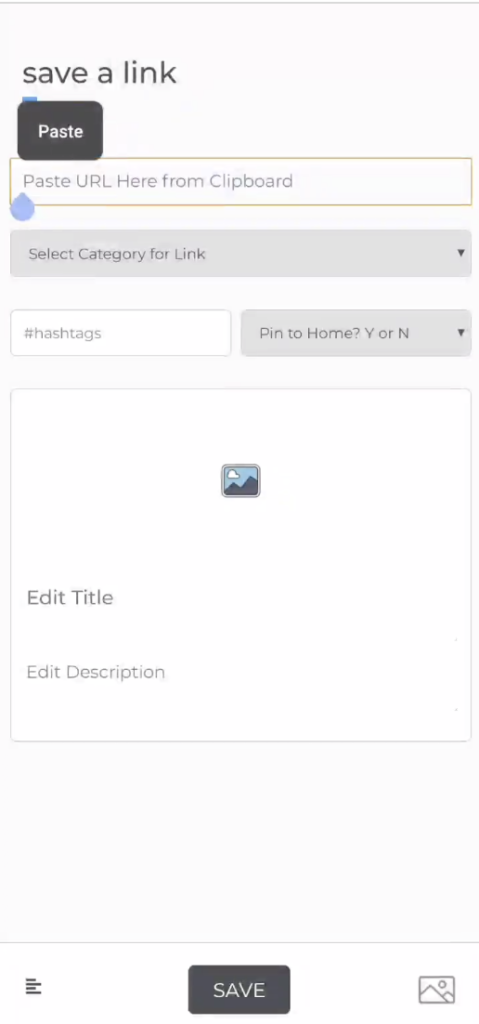
Step Three: Paste URL from Clipboard
After you click on the add a link button from the homescreen, you’ll visit the following page, where you can ‘Paste’ the url from the clipboard into the field outlined in the image below.
Step Four: The app fetches data about your url
Including, the title, description and an image if it is available. If you would like to upload your own image, you can use the icon in the bottom right corner of the UI.
You can also ‘Edit’ the title and description if you would like by simply clicking into the text fields underneath the image of your saved link.
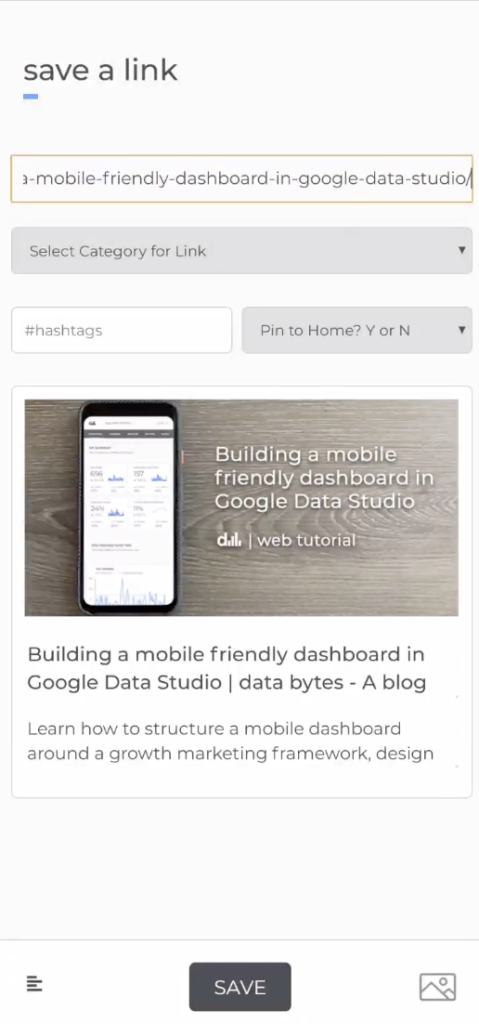
Step Five: Click the Save Button to save it directly to your Google Sheet
You’ll receive a notification at the top of the screen (in green) if you have saved it successfully 🙂
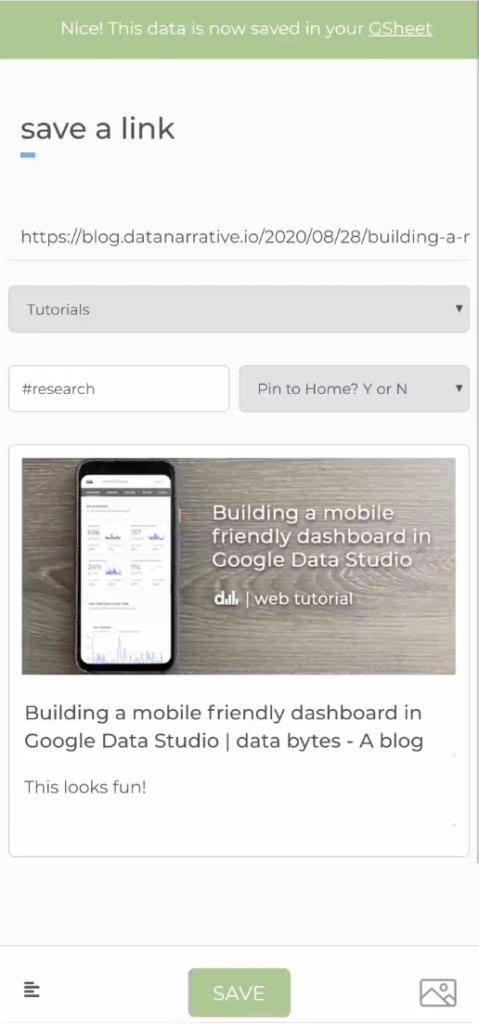
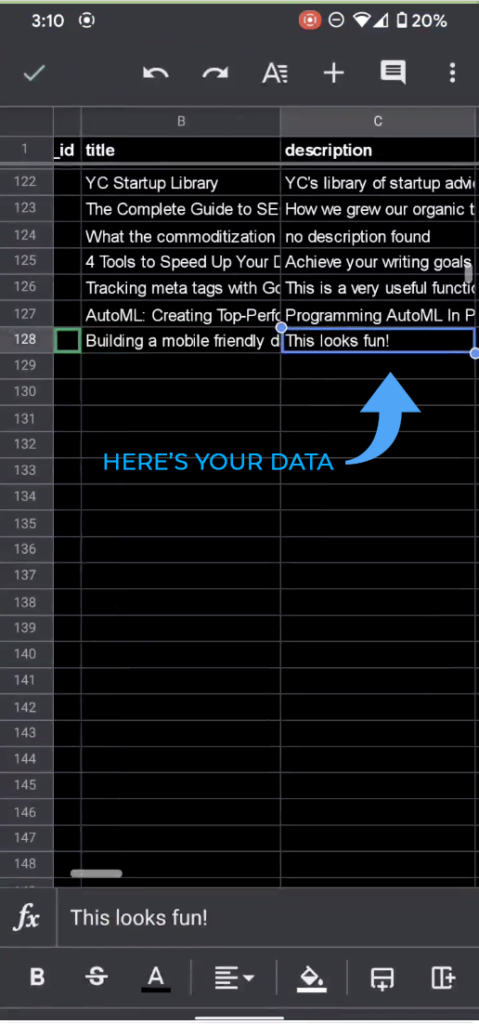
Last Step: View Your data in Google Sheets
On save, the data gets pushed to your Google Sheet as seen in the image below!
That’s it!
You’ve successfully saved a link with data spaces and have automatically sent this data to your own Google Sheet.
Now that you know how to save a link, why not get started and simplify how you organize the rest of your business data on the web with data spaces!
If you need any help, feel free to connect with me here on LinkedIn or through our contact page. Learn more about data spaces at datanarrative.io
Happy data organizing!

Comments